Wemos D1 mini 보드를 사용하여 외부 DB에 데이터 전송을 한다.
esp8266의 기본적인 WIFI예제들을 조금 참고해서 작성하였다.
MariaDB전송은 이전 글에서의 내용과 같다.
[아두이노] - Arduino Uno + Ethernet shield 를 사용하여 DB로 데이터 전송하기(아두이노에서 mariaDB로 데이터보내기)_01
Arduino Uno + Ethernet shield 를 사용하여 DB로 데이터 전송하기(아두이노에서 mariaDB로 데이터보내기)_01
Arduino Uno와 Ethernet shield를 이용하여 측정한 센서값을 PC에 설치된 DB에 전송하려고 한다. 사용 제품 1.Arduino Uno 2.Arduino Ethernet shield W5100 선행 설치 1.Arduino IDE 2.Mysql or MariaDB --------..
glorlfy.tistory.com
[아두이노] - Arduino Uno + Ethernet shield 를 사용하여 DB로 데이터 전송하기(아두이노에서 mariaDB로 데이터보내기)_02
Arduino Uno + Ethernet shield 를 사용하여 DB로 데이터 전송하기(아두이노에서 mariaDB로 데이터보내기)_02
Arduino Uno와 Ethernet shield를 이용하여 측정한 센서값을 PC에 설치된 DB에 전송하려고 한다. 사용 제품 1.Arduino Uno 2.Arduino Ethernet shield W5100 3.DHT22 온습도센서 선행 설치 1.Arduino IDE 2.Mysql..
glorlfy.tistory.com
|
1
2
3
4
5
6
7
8
9
10
11
12
13
14
15
16
17
18
19
20
21
22
23
24
25
26
27
28
29
30
31
32
33
34
35
36
37
38
39
40
41
42
43
44
45
46
47
48
49
50
51
52
53
54
55
56
57
58
59
60
61
62
|
// WIFI 설정
#include <ESP8266WiFi.h> // ESP8266 WIFI
char ssid[] = "**********"; // 사용하고자 하는 WIFI 이름
char password[] = "********"; // WIFI 비밀번호
// MariaDB 설정
#include <MySQL_Connection.h>
#include <MySQL_Cursor.h>
WiFiClient client; // 이더넷 대신 WIFI 사용
MySQL_Connection conn((Client *)&client);
char INSERT_SQL[] = "INSERT INTO *****.*****(pw, name) VALUES (%s, %s)"; // 쿼리 입력
char query[128];
byte mac_addr[] = { 0xDE, 0xAD, 0xBE, 0xEF, 0xFE, 0xED };
IPAddress server_addr(125,138,180,153); // DB주소
char db_user[] = "****"; // MariaDB ID
char db_password[] = "****"; // MariaDB PW
void setup() {
Serial.begin(115200);
// 와이파이를 연결한다.
Serial.println();
Serial.print("Connecting to ");
Serial.println(ssid);
WiFi.begin(ssid, password);
while (WiFi.status() != WL_CONNECTED) {
delay(500);
Serial.print(".");
}
Serial.println("");
Serial.println("WiFi connected");
Serial.println("IP address: ");
Serial.println(WiFi.localIP());
// MariaDB를 연결한다.
Serial.println("Mysql Connecting...");
if (conn.connect(server_addr, 3306, db_user, db_password)) {
delay(1000);
}
else{
Serial.println("Mysql Connection failed.");
conn.close();
}
}
void loop() {
sprintf(query, INSERT_SQL, "2", "3");
Serial.println("Recording data.");
Serial.println(query);
MySQL_Cursor *cur_mem = new MySQL_Cursor(&conn);
cur_mem->execute(query);
delete cur_mem;
delay(2000);
}
|
cs |
1. WIFI정보 설정
|
1
2
3
4
|
// WIFI 설정
#include <ESP8266WiFi.h> // ESP8266 WIFI
char ssid[] = "**********"; // 사용하고자 하는 WIFI 이름
char password[] = "********"; // WIFI 비밀번호
|
cs |
2. MariaDB 설정
|
1
2
3
4
5
6
7
8
9
10
11
12
|
#include <MySQL_Connection.h>
#include <MySQL_Cursor.h>
WiFiClient client; // 이더넷 대신 WIFI 사용
MySQL_Connection conn((Client *)&client);
char INSERT_SQL[] = "INSERT INTO *****.*****(pw, name) VALUES (%s, %s)"; // 쿼리 입력
char query[128];
byte mac_addr[] = { 0xDE, 0xAD, 0xBE, 0xEF, 0xFE, 0xED };
IPAddress server_addr(125,138,180,153); // DB주소
char db_user[] = "****"; // MariaDB ID
char db_password[] = "****"; // MariaDB PW
|
cs |
3. setup : WIFI 연결하고 MariaDB 연결
|
1
2
3
4
5
6
7
8
9
10
11
12
13
14
15
16
17
18
19
20
21
22
23
24
25
26
27
28
29
30
|
void setup() {
Serial.begin(115200);
// 와이파이를 연결한다.
Serial.println();
Serial.print("Connecting to ");
Serial.println(ssid);
WiFi.begin(ssid, password);
while (WiFi.status() != WL_CONNECTED) {
delay(500);
Serial.print(".");
}
Serial.println("");
Serial.println("WiFi connected");
Serial.println("IP address: ");
Serial.println(WiFi.localIP());
// MariaDB를 연결한다.
Serial.println("Mysql Connecting...");
if (conn.connect(server_addr, 3306, db_user, db_password)) {
delay(1000);
}
else{
Serial.println("Mysql Connection failed.");
conn.close();
}
}
|
cs |
4. loop : DB에 2, 3의 고정값 전송
|
1
2
3
4
5
6
7
8
9
|
void loop() {
sprintf(query, INSERT_SQL, "2", "3");
Serial.println("Recording data.");
Serial.println(query);
MySQL_Cursor *cur_mem = new MySQL_Cursor(&conn);
cur_mem->execute(query);
delete cur_mem;
delay(2000);
}
|
cs |
코드는 굉장히 쉽다.
위의 코드대로 전송하면 DB에는 다음과 같이 데이터가 들어간다.
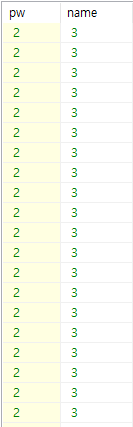
위 코드를 토대로 다양한 IoT 개발에서 센서값을 DB로 쉽게 전송할 수 있다.
'아두이노' 카테고리의 다른 글
| Wemos D1 mini 세팅하기 (0) | 2021.02.02 |
|---|---|
| Arduino Uno + Ethernet shield 를 사용하여 DB로 데이터 전송하기(아두이노에서 mariaDB로 데이터보내기)_02 (2) | 2020.11.05 |
| Arduino Uno + Ethernet shield 를 사용하여 DB로 데이터 전송하기(아두이노에서 mariaDB로 데이터보내기)_01 (0) | 2020.11.04 |


최근댓글